


Konsta UI & Framework7
Framework7 VueでKonsta UI Vueコンポーネントを使用する方法を見てみましょう。
Framework7プロジェクトの作成
まず、Framework7 CLIを使用してFramework7 Vueプロジェクトを作成します。
Tailwind CSS & Konsta UIのインストール
作成したFramework7プロジェクトで、Tailwind CSSとKonsta UIをインストールする必要があります。
npm i tailwindcss konsta
プロジェクトルートに`postcss.config.js`ファイルがあります。そこに`tailwindcss`プラグインを追加する必要があります。
module.exports = {
  plugins: {
    tailwindcss: {}, // <- add this
    'postcss-preset-env': {},
  },
};
`tailwind.config.js`ファイルを作成し、次の内容でプロジェクトルートフォルダに追加します。
const konstaConfig = require('konsta/config');

module.exports = konstaConfig({
  content: ['./src/**/*.{js,jsx,ts,tsx,vue}', './src/index.html'],
  darkMode: 'class',
});
アプリのスタイルにTailwind CSSを含めます。`src/css/app.[css|scss|less]`の先頭に次のコードを追加します。
@tailwind base;
@tailwind components;
@tailwind utilities;
KonstaProvider
これで、KonstaProviderを設定して、グローバルパラメータ(`theme`など)を設定できるようになります。
`src/components/app.vue`で、メインのFramework7の`App`コンポーネントを`KonstaProvider`でラップする必要があります。
<template>
  <!-- Wrap Framework7's App with KonstaProvider with theme="parent" -->
  <k-provider theme="parent">
    <f7-app v-bind="f7params"> ... </f7-app>
  </k-provider>
</template>
<script>
  import { konstaProvider } from 'konsta/vue';
  import { f7App /* ... */ } from 'framework7-vue';

  export default {
    components: {
      konstaProvider,
      f7App,
    },
    setup() {
      const f7params = {
        theme: 'ios',
        // ...
      };

      return {
        f7params,
      };
    },
  };
</script>
使用方法
Framework7は非常に強力で柔軟なルーターを備えており、正しく動作させるためには、Framework7のルーター関連コンポーネント(`App`、`View`、`Page`、`Navbar`、`Toolbar`)を使用する必要があります。
残りのコンポーネント(Konsta UIの代替手段がある場合)は、Konsta UI(`konsta/vue`)から取得できます。
サンプルページ
すべてが設定されたら、Framework7のページコンポーネントでKonsta UI Vueコンポーネントを使用できます。
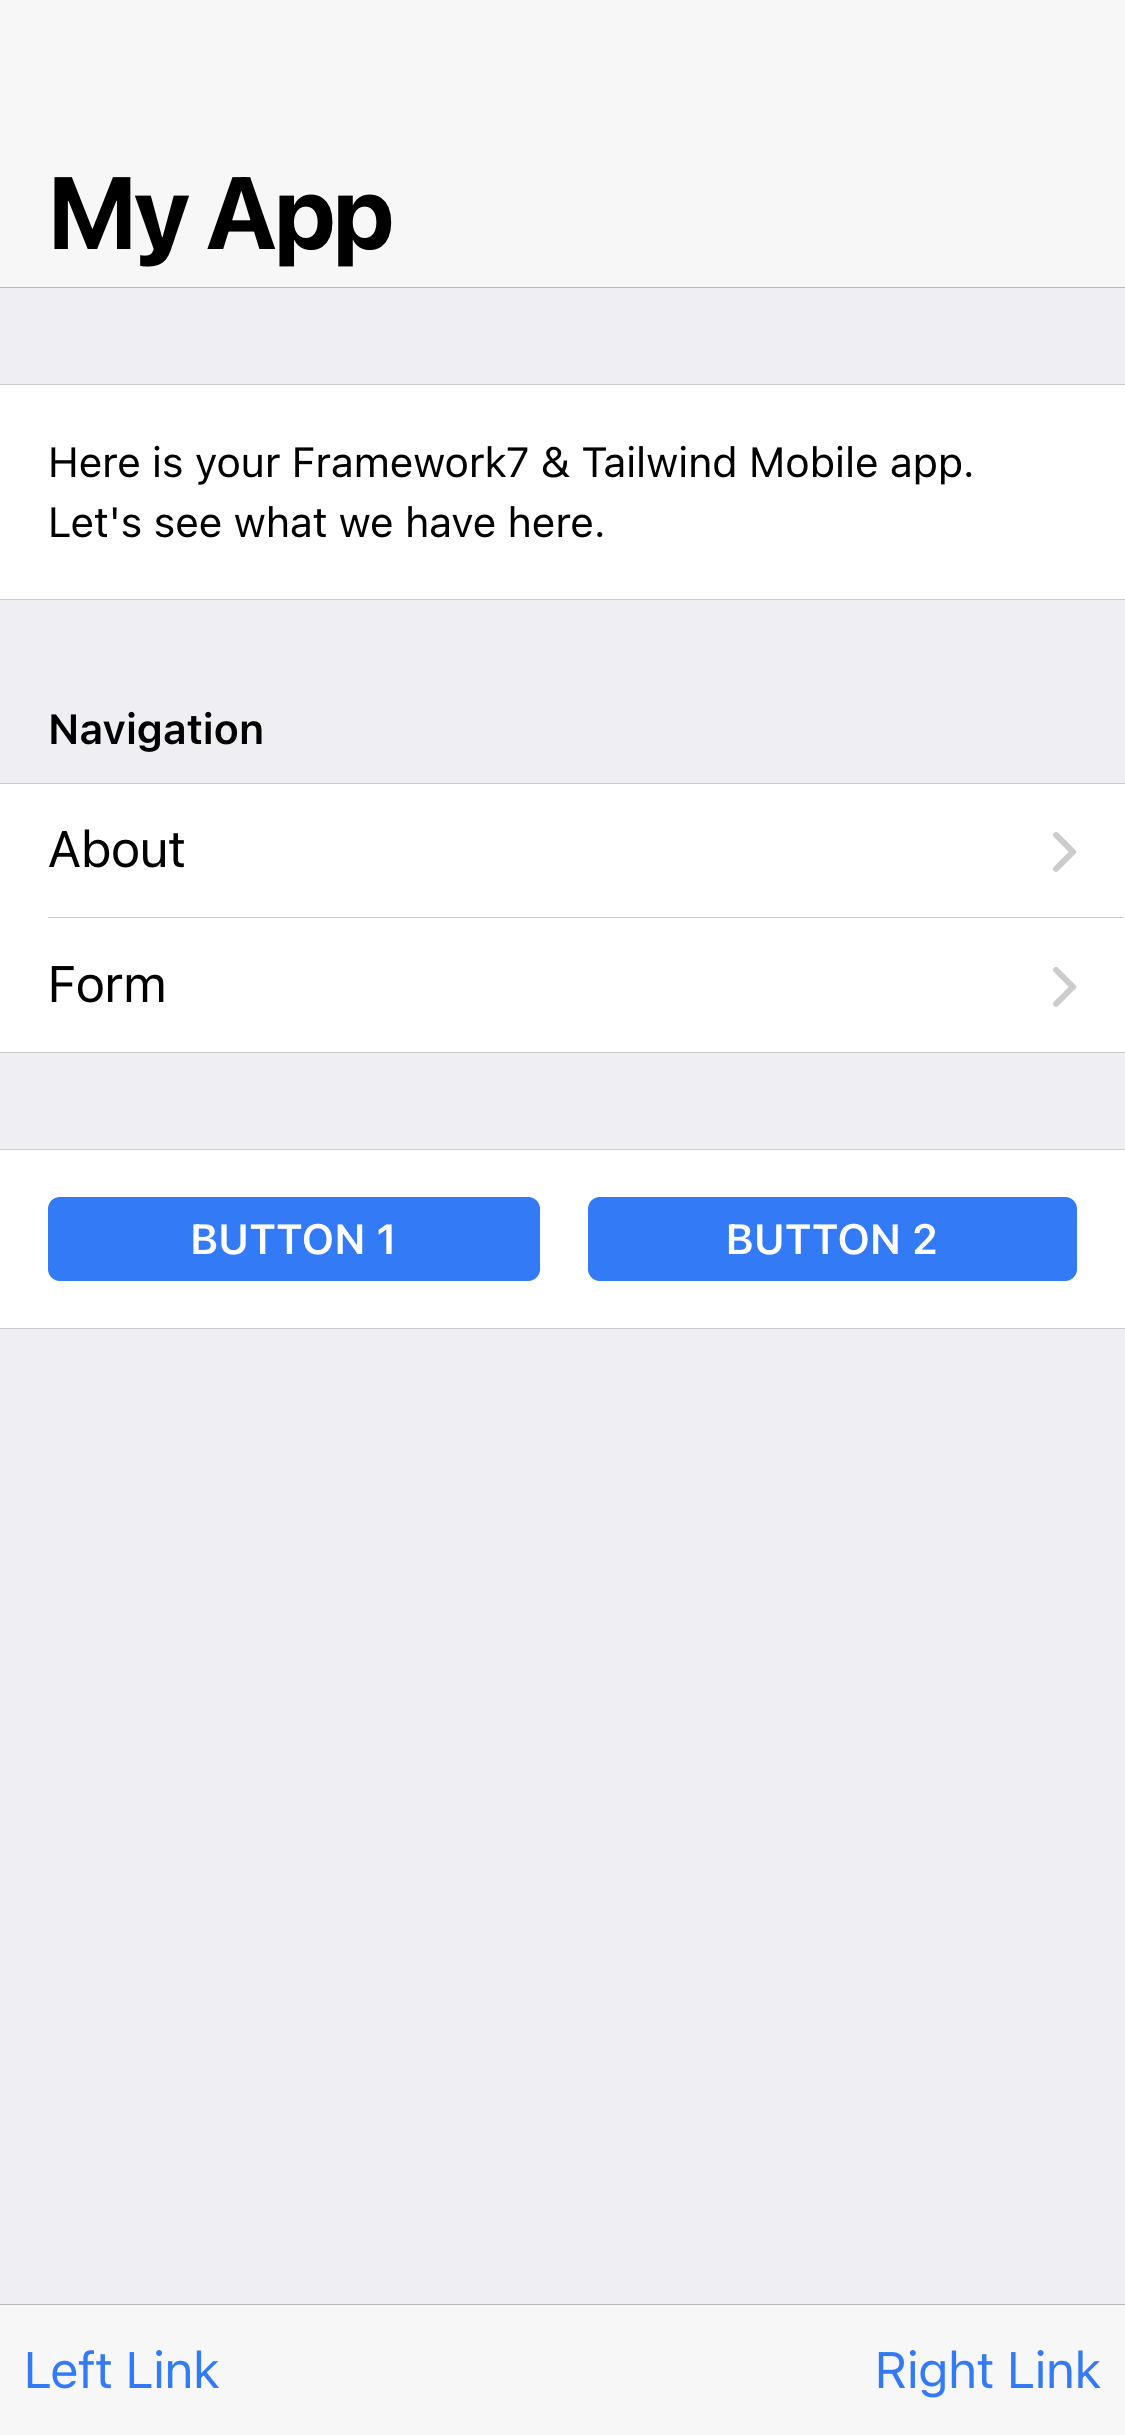
たとえば、`src/pages/home.vue`を開いて、次のように変更してみましょう。
<template>
  <!-- Use Page, Navbar & Toolbar from Framework7 -->
  <f7-page name="home">
    <f7-navbar title="My App" large />
    <f7-toolbar bottom>
      <k-link toolbar>Left Link</k-link>
      <k-link toolbar>Right Link</k-link>
    </f7-toolbar>
    <!-- In page content we can use Konsta UI components -->
    <k-block strong>
      <p>
        Here is your Framework7 & Konsta UI app. Let's see what we have here.
      </p>
    </k-block>
    <k-block-title>Navigation</k-block-title>
    <k-list>
      <k-list-item href="/about/" title="About" />
      <k-list-item href="/form/" title="Form" />
    </k-list>

    <k-block strong class="flex space-x-4">
      <k-button>Button 1</k-button>
      <k-button>Button 2</k-button>
    </k-block>
  </f7-page>
</template>
<script>
  // Use Page, Navbar, Toolbar from Framework7
  import { f7Page, f7Navbar, f7Toolbar } from 'framework7-vue';
  // Konsta UI components
  import {
    kBlock,
    kButton,
    kList,
    kListItem,
    kLink,
    kBlockTitle,
  } from 'konsta/vue';

  export default {
    components: {
      f7Page,
      f7Navbar,
      f7Toolbar,
      kBlock,
      kButton,
      kList,
      kListItem,
      kLink,
      kBlockTitle,
    },
  };
</script>
結果として、次のページが表示されるはずです。
ダークモード
Tailwind CSSはダークモードを有効にするために`dark`クラスの追加を必要とする一方、Framework7(バージョン6)は`theme-dark`クラスを必要とすることに注意してください。Framework7バージョン7はダークモードに同じ`dark`クラスを必要とします。
したがって、ダークモードを使用する場合は、ルート要素(できれば``要素)に`dark theme-dark`の両方のクラスを設定/削除してください。
カラースキーム
Framework7とKonsta UIは、メインテーマカラーに異なるソースを使用します。Framework7のテーマカラーはCSSカスタムプロパティを介して構成されますが、Konsta UIのテーマは`tailwind.config.js`で設定する必要があります。
| カラー | Framework7 CSS変数 | Konsta UIプロパティ |
|---|---|---|
| プライマリ | --f7-theme-color | プライマリ |
| プライマリ ダーク | --f7-theme-color-shade | primary-dark |
| プライマリ ライト | --f7-theme-color-tint | primary-light |
テーマカラーが `#ff6b22`だとすると、次のように設定する必要があります。
`app.css`で(Framework7のテーマカラーを設定するために)
:root {
  --f7-theme-color: #ff6b22;
  --f7-theme-color-rgb: 255, 107, 34;
  --f7-theme-color-shade: #f85200;
  --f7-theme-color-tint: #ff864b;
}
`tailwind.config.js`で(Konsta UIのテーマカラーを設定するために)
const konstaConfig = require('konsta/config');

module.exports = konstaConfig({
  content: ['./src/**/*.{js,jsx,ts,tsx}', './src/index.html'],
  darkMode: 'class',
  // extend primary color
  theme: {
    extend: {
      colors: {
        primary: {
          light: '#ff864b',
          DEFAULT: '#ff6b22',
          dark: '#f85200',
        },
      },
    },
  },
});